13 March 2014

Skullwoman: Update - Hair

Today I have made a base mesh for the hair in Maya which I will further sculpt into in Mudbox. For the strands I will be adding planes with alpha maps on them.

Later today I plan to watch some Digital tutors tutorials for hair in Maya as this may be an alternative I could look into.


I have scaled the hair up to fit the mudbox model, worked more into the face altering the eyes, mouth and skull.

10 March 2014

Next Project: Skull woman

I have decided to make a sculpt of this painting by Hugo Richard (http://www.behance.net/hugorichard), I will not be doing a full sculpt and will instead do a bust as that is where the majority of the detail is. I used the Mudbox base bust and a skull base downloaded from the mudbox community.


Used this image of facial muscles for reference when editing the base Mudbox bust

I have altered the face to look closer to the painting and removed half of the skull (which I will sculpt further into to show more detail later on)

To do the hair I will most likely create a basic mesh in Maya and then sculpt into it, the extra strands will be planes using alpha maps

4 March 2014

Camel: Turntable + Renders of highest level of detail baked down to lower subdivisions


Face/Front view


Back view


Side view

Part of me is tempted to bake the highest level of detail from the Mudbox sculpt to a higher level of subdivision than this since this is quite low poly (2744 polys, aside from that I'm happy with how this model has gone and I will use the skills I learnt producing this and take them further with my next projects

3 March 2014

Camel: UV's and Texturing

Unwrapped the UV maps on the model by exporting it as an .obj and then unwrapping the UV's using Roadkill and then imported the UV's of the saved Roadkill .obj file into the mudbox file

Used the projection paint tool to get the base colours and textures onto the model I will work into this using the paint tool


The unwrapped UV's imported into Mudbox with the base projection mapped image texture. I should of reorganised the UV's to make better effective use of the UV area, especially for the face to ensure I get the most detail where it is needed.


Finished painting the camel, these are screenshots of the finished textures on the highest level of detail

26 February 2014

Face, reptopology and symmetry


I have added more detail to the camels face, using previous reference images. Some areas could do with extra smoothing such as the jaw but for now this level of detail will suffice.

I currently need to retopologise my model since the mirroring is slightly skewed meaning the sculpt isn't symetrical. I will probably retopologise using the curve tool as this will mean I can determine the direction I want my polygons to flow instead of letting Mudbox do this for me which will create a less desirable effect


Here I have retopologised the first subdivision by selecting two adjacent faces and setting the topological axis and then selecting one side of the face then right clicking mirror on the layer to flip it.
An issue I am having however is that it will only mirror my first layer but not the higher levels of detail without getting errors because these layers also need to be mirrored and I am unsure on how to fix this.

UPDATE:


On collapsing the layers I have been able to mirror the sculpt allowing symmetry. The main drawback to this is that the previous low poly sculpt has been lost however I can still retopologise the sculpt and bake the detail.

I am now adding the extra layers of detail such as fur and have made a brush for this from the mudbox preset stamp of lines edited to be more linear and fur like. After this I will start painting colours into the sculpt.

20 February 2014

Camel Update - Reference


Yesterday I had feedback that my camels back legs look too straight and also that the camel is too squat and doesn't have a long enough back. Since my last post the back legs have been worked into further clearly showing the bone structure from the side view but this isn't as apparent from the front.
I have also moved back the backlegs to make the back longer in accordance to the reference images.
I have also added more detail to the face and legs.

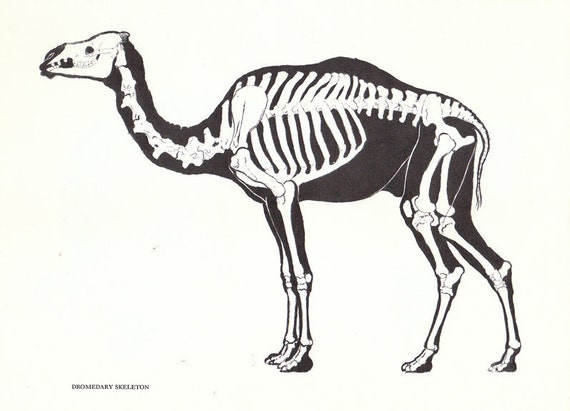
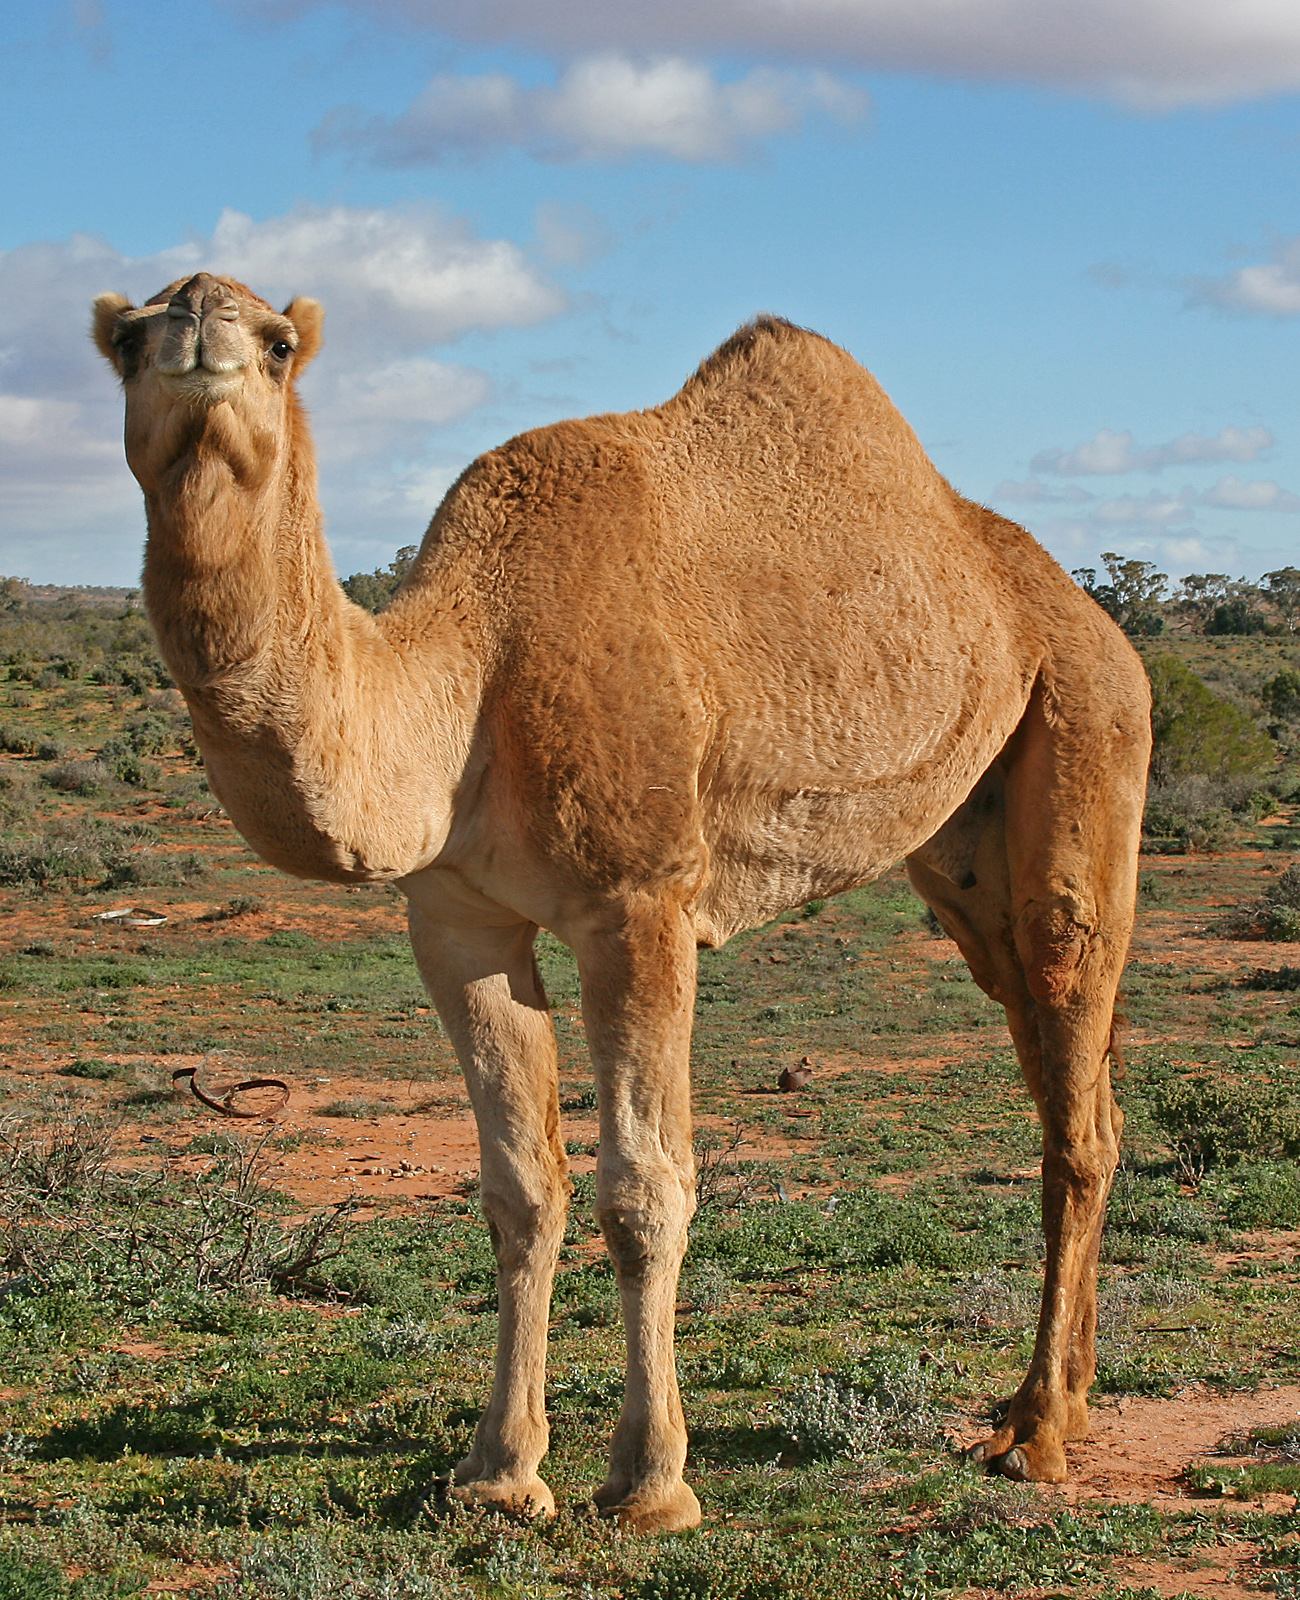
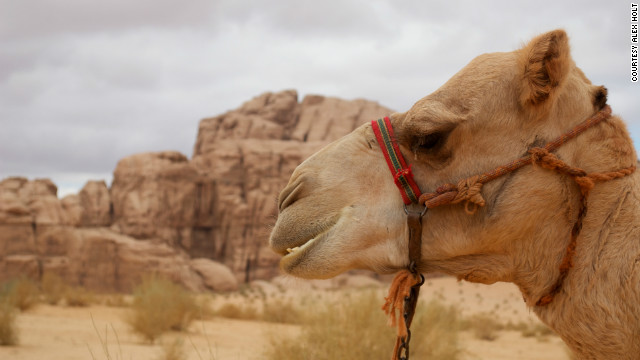
Also I realised that I had not posted images that I was using for reference so here they are:


Camel skeleton's for bone structure reference
Side view of camel


Close up of face for detail


Balaclava Helmet

A few days ago I did a helmet design based on 18th century balaclavas worn by Danish women from Fano. References from this photography website (under Strude) http://www.trinesondergaard.com/top_menu_02.php?strude?images


Work in progress so far, might try out other designs


Might try out some different variations of this since this has a very medieval (though slightly ninja) fantasy feel. I could try out different themes with this concept such as more ancient maybe tribal or even sci-fi.

Watching a Mudbox tutorial on digital tutors. Gave some extra insight on some of the brush settings in Mudbox which was helpful.

16 February 2014

Mudbox Normal Map Tutorial + Schedule

Watched this quick tutorial on baking normal maps in Mudbox. When I finish the sculpt and bake the high poly camel mesh to the low poly this shouldn't take long to do.


Current plan is to work on Mudbox/Maya at uni throughout the week then Photoshop evenings and weekends. This should ensure I always have concepts I can then take into Maya then Mudbox keeping a steady flow of work. Obviously if behind on one or the other I can change this around but for now this should work well as a rough guide as to how I will spend my time.

13 February 2014

Yesterday

Realised I didn't upload any in progress screenshots of the low poly Maya model of the camel and cannot find the file. I will see if I can find the file on the university computers.


Level 2 of the camel sculpt so far. I've been using this level to get the rough shapes in.

I have used reference photos of camels (front, side and skeleton) to get the shape better as my Maya model was far too wide from being made with just a front view as camels are actually much thinner than they appear from a side view.

 I had an issue earlier where the smooth tool was ineffectual even at the maximum strength, this was somewhat rectified by scaling up the model as it was very small before and using the smooth tool at the lower levels of the sculpt first.


Level 4 of the camel sculpt so far. This is the top level with more detail. At the moment it simply has more polys but I will be drawing more levels of detail onto this level soon.

I also read this simple texturing guide:
http://gametextures.com/blog/wp-content/uploads/2014/02/InfoGraphic_BasicMaterials2.png
The metal specular highlights look useful and I will likely use these for if I use any textures with metal in.

11 February 2014

Pirette Ideas

Started by finding stock images in various poses, put them together then filled in the silhouette. After this I drew where the bones would roughly be to make sure that everything was in proportion.

I then found images of different styles of clothes and hair and drew them onto the silhouettes so I have a clear comparison and can gauge what works well so I can mix and match. I wanted to use a sail for at least one item of clothing for each design.
The first is wearing typical 18th century pirate clothes but with a poncho made from a sail, as poncho's are from South America I think this works fairly well. Might change some aspects of it like the placement of the stitching, length and hole though. Hairstyle is a fishtail plait to fit in with the nautical theme.
The second is wearing a cape (made from a sail), bucket boots with 'butterflies' (I might put a skull and crossbones on these as it'd fit well with the shape). Not sure what exactly to call the hairstyle, plaits pulled across from one side of the head to the other? This one doesn't look particularly interesting but I think I'll use the bucket boots for the final design.
The third design ended up with all of the not-so-great ideas, they have a sail skirt, some boots, a 18th century coat-thing the hair is messy and windswept with shells and bits of rope etc in it.
Fourth design is wearing a sail dress tied with rope and pirate coat and typical 18th century buckled shoes. Thought it might look interesting to put them in a powdered wig but have their own hair escaping it.
I will most likely combine 1 and 4 with 2's shoes.

20 January 2014

Hiatus

Been struggling with my dissertation so there has been a lack of updates. Once this is more on track will be more regular updates

Pirette Concept

Was browsing Wikipedia (as you do) and came across this:
Female pirates of this time (18th century) also had a very unique appearance. In modern media female pirates are often shown to be dressed in the same fashion as their male counterparts. While true, there are also at least a half dozen first hand accounts, collected from port authorities as well as pirating victims, describing a style that was unique to their gender. One trend that was especially popular among female pirates of the South American Pacific coast and Caribbean was incorporating common sailing equipment such as fishing nets, jackstays, trunnels, chocks and cordage into their clothing. https://en.wikipedia.org/wiki/Women_in_piracy

Thought this sounded like an interesting idea and could use it to come up with a more unique pirate concept.
Fishing/Sailing equipment, Ariel (The Little Mermaid) wearing a dress made from a sail and rope and woman pirates


10 December 2013

Arctic Creature

I have been looking at creatures which live in cold climates. They generally have a grey/brown and white colour scheme for camoflague, thick fur or skin and often have tusks or horns.

Here I have looked at animals from warm climates such as camels, rhinos and lions and thought about what they might look like in another climate. The first concept is based on a camel, its hump has white patches to camoflague it in its habitat so from a distance it looks like a mountain and it would store nutrients from the barren landscape there so it can survive a long time without food. I think it could of done with looking heavier with thicker fur.
The second concept is based on a rhino with some elements from reindeer and horses. Compared to the other two I'm not as happy with this one. Like with the camel I was thinking these could maybe be domesticated to a similar extent horses are.
The third is based on a lion and sabertooth tiger. I extended the mane to cover the lions entire body leaving the face and legs covered in shorter hair, I added some spots and stripes to mimic the pattern young lions have.

I am currently thinking of making the mountain camel and it would be useful to have a detailed human character modelled I could include a person either standing next to it holding some kind of reins or sitting on it. For now I will use the low poly model for learning Mudbox and after I will

Solo Work

I'm going to be doing character concepts which I will then make into a low poly model and make hand painted textures for it.

At the moment I am thinking of basing each concept on either a species or a particular environment however I could combine the two.

Environments:
Underwater
Snow
Desert
Rainforest
Swamp
Alien planet - gaseous or arid?

Species:
Insects
Crustacean
Fish
Mollusc
Birds
Reptiles
Amphibians
Mammals -Ungulates, rodents, cetaceans (whales, dolphins etc), carnviores, apes


I would like to get to this kind of level


2 May 2013

Underwater Creature

Moodboard:
Started looking at shelled underwater creatures as I thought it'd be interesting to make a armored creature, ended up with a lot of sea slugs as they have some interesting shapes and colours. Will try and combine these two making an armored sea slug.

Sketches:
Sketches of a seaslug, lobster, lionfish and isopod. Drew these using blocks of colour picked from my moodboard

WIP:
 
First WIP, forgot to take earlier ones stretching out the sphere. Made the sphere a more slug like shape, added antenna, a frill and started to add the shell.
 Second WIP of making the sea slug in Sculptris. Here I got the slug shape down and added more of a shell to its back using the draw tool in inverse to get the dips and the draw tool to give the shell a more 3D effect.

Finished the model, changed the material to a more suitable one with a different lighting point and then used this as the base for my final paintover.

Final:
Would of liked to add more to this, maybe some patterns and anemones/barnacles/seaweed/etc living on its back to give a sense of scale and detail. Was thinking about giving it some legs and/or claws to make the design a bit more interesting and make it more crustacean-like but in some ways I think it might of looked too weird and its better how it is.
I painted over the scultpris model and used adjustment layers to make the shadows and highlights stronger